In the ZEUS, you can generally achieve the same result in different ways. This applies to everything related to creating, editing, and saving events. While creation and editing of events are done in a single window, which can be accessed in various ways, there are 3 resources for saving events:
- Database
- Event Pool
- Session
Each of them has its own features, but more on that later. For now, let’s talk in detail about how to create and edit events.
Creating and Editing Events
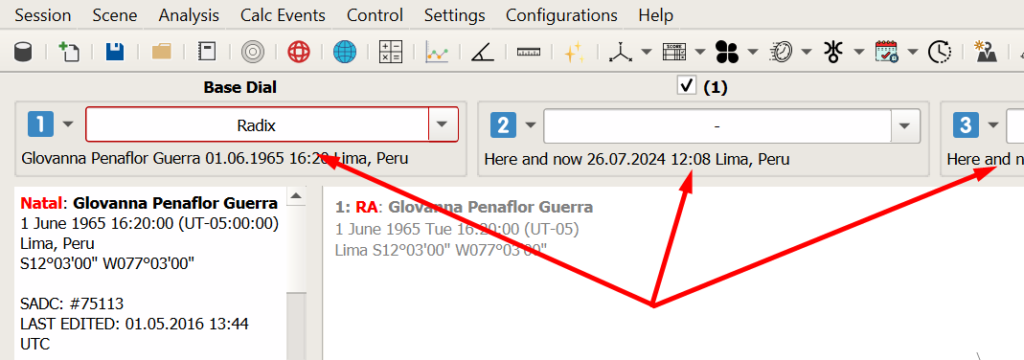
In the dials’ control panel, there are rows with brief information about the events. Double-clicking on such a row will open the event editing window, where you can enter new data or edit existing ones. You can also access this window from the main menu via “Session/New Event,” and from the dials menu via “New” (to create a new event) or “Edit” (to edit an event).
Here, you can enter the event’s name, date, time, and location. While entering the location, suggestions will appear, and if the desired one is among them, you can select it. If the desired location is not in the Atlas, you can manually enter the geographic coordinates and the time difference from Greenwich. If you do not change the time difference, it will default to the time zone of the replaced location.
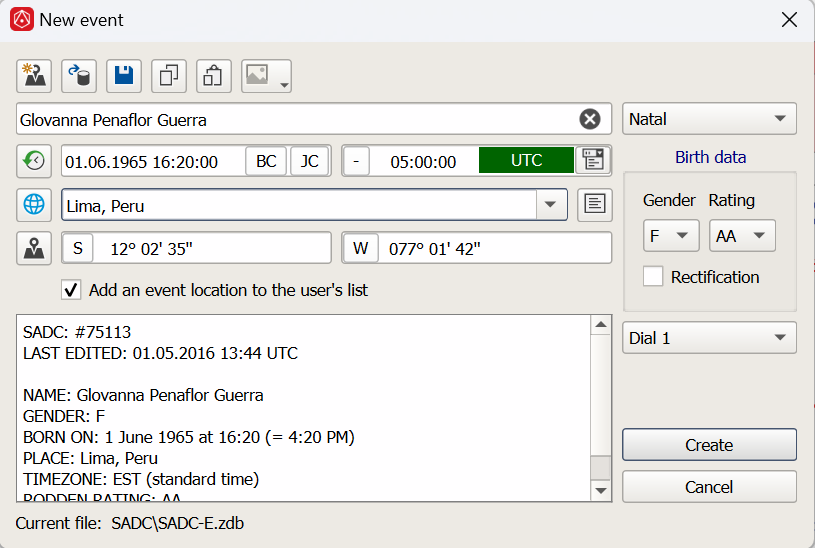
You can also add a comment and choose the event type from the offered abbreviations. These abbreviations do not affect the chart creation but help with sorting or searching in the Database. If the event type is “Natal,” you can specify the gender, Rodden rating, and check a box if you consider the data rectified.
You can save the event to the database immediately by clicking the floppy disk icon. The event will be saved to the current file, which is either the “Default” file or the last file you worked with by default. The path to this file is shown at the bottom of the window.
By clicking “Create,” a chart will be built in the corresponding dial. If you did not save the event before creating the chart, you could save it later from the dial menu by selecting “Save.”

Event Pool
Now, a few words about the left panel, specifically the part containing the “Event Pool.” This is a temporary database for operational use. It contains events you load from the database or create, as well as those generated while working with the chart. For example, when creating a solar return chart, the data in the top panel remains as background data, indicating the time and place for the solar return calculation. However, a reference event, i.e., the solar return data, will be generated in the left panel (provided the “Auto-save ref. events” option is enabled in the Event Pool context menu). If you enable the “Auto-save events” option, all new events will be automatically saved in the Event Pool.
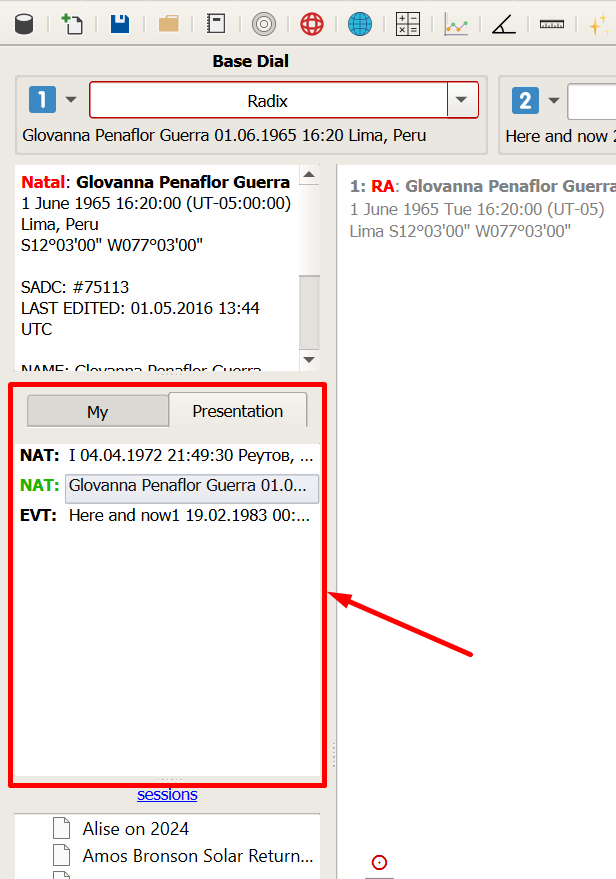
Events already saved in the main database will be highlighted in an alternative color. If needed, events from here can be saved to the Database. But even if you forget to do this, the program will save all temporary events to a special file upon closing, and you will see them in the same window the next time you launch the program.
From the Event Pool context menu, you can save events to the main database, delete them, or apply them to a specific dial. You can clear all temporary events from this window with one action. You can also save all or selected events to the Database with one click. Events are selected in the standard way: selecting adjacent events with SHIFT, arbitrary selection with CTRL (Cmd on Mac).
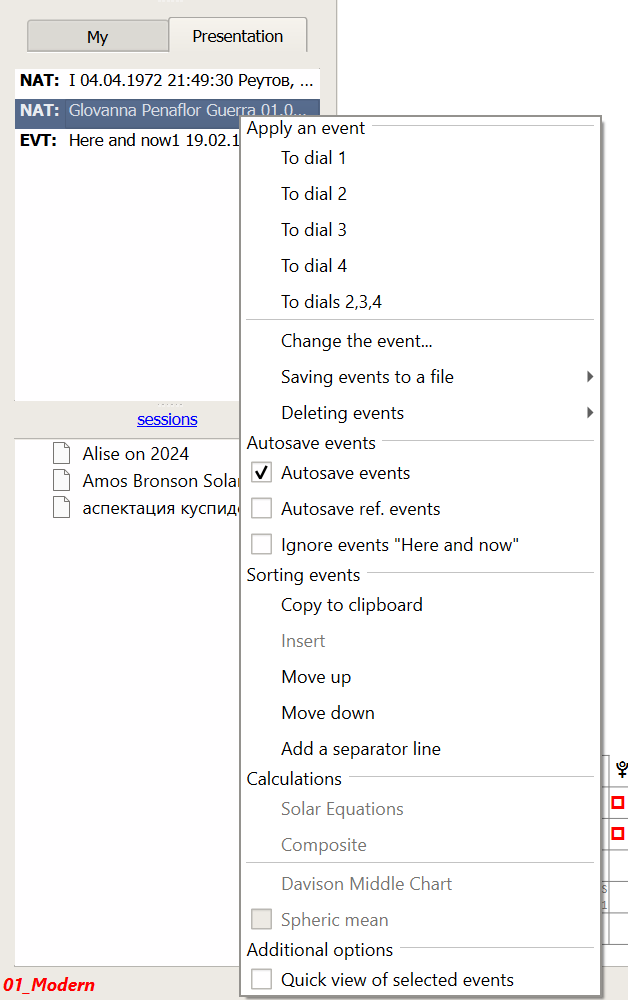
Among the many options in the Event Pool context menu, there are those for calculating charts: Solar Arc Directions, Davison’s Mean Chart, Composite. To do this, select the necessary events and choose the corresponding chart from the context menu.
The Event Pool can contain several tabs. For example, one for clients and another for research work. You can manage tabs from the Event Pool header context menu.
Database
Unlike the Event Pool, the Database contains all saved events. You can open the Database from the main menu, the event editing window, or the dials menu. If the Database is accessed from the dials menu, you can apply an event to the corresponding dial by double-clicking on the event’s row.
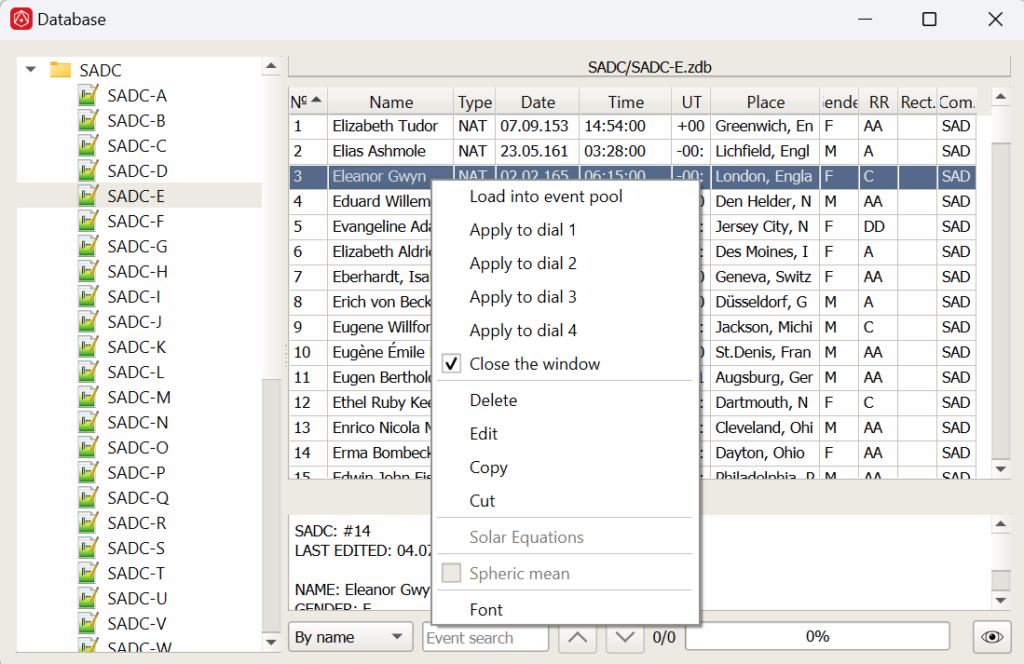
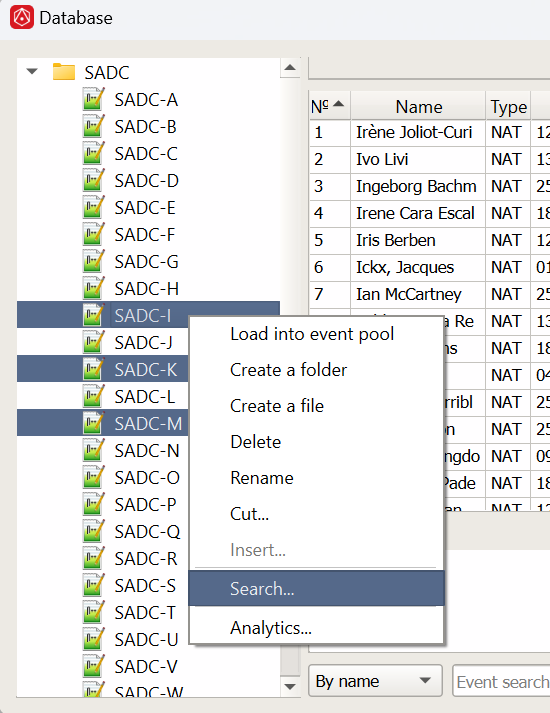
The Database’s left window contains files and folders. Events are saved in files, and folders are used for cataloging files. For example, create a file named “test” in the Database’s root. You can perform standard actions (create, delete, rename, etc.) with files and folders through the context menu.
You can load events from the Database into the Event Pool. To do this, select the file in the Database whose events you want to load into the Event Pool, and choose “Load into Event Pool” from the context menu. Similarly, you can load selected events from any file.
You can also search for saved events based on various criteria. The found events are placed in a file, which you can name yourself. By default, this file is named “Found.”
Events can be edited directly in the Event Pool or in the Database.
Session
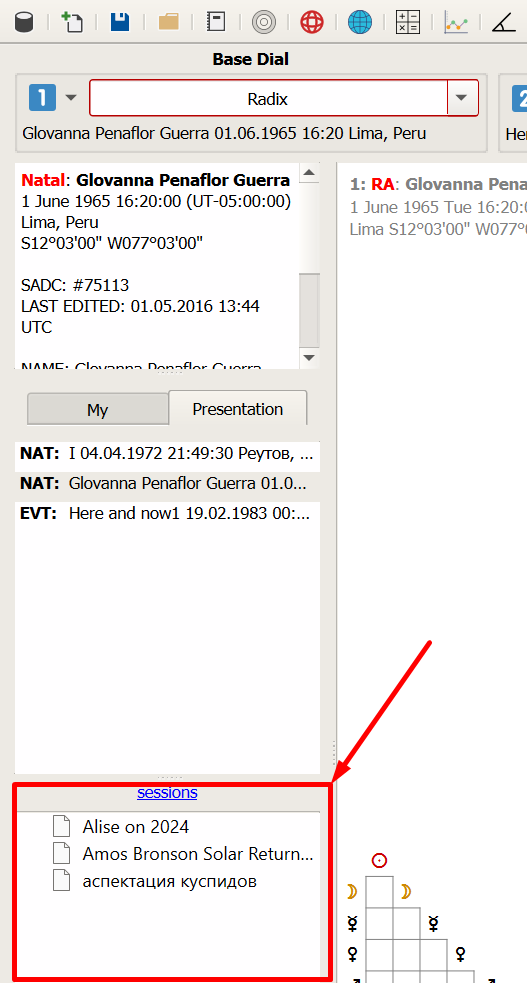
In the left panel, below the Event Pool, is the session area. A session is a file that includes information about:
- Current configuration settings
- Events for each dial
- Dial activity
- Chart types in each dial
- Current dial number
- Aspect direction
- Panel visibility
- Locations of open dialog windows (those that can be saved)
In essence, a session saves all your current work. You can select the sessions folder by clicking on the session area header.
These were the main points related to creating, saving, and editing events in the ZEUS.
Thank you for the information, It’s very helpful.